Configuration
1. Configure integration instance in Lime admin
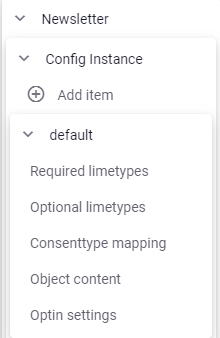
Open Lime admin -> Add-ons/Settings -> Newsletter -> Config Instance from the webclient.
Upgrading from a version older than 3.0?
Try to save the config and fix any errors that appear.
Create a new config instance
- Click
Add item, Insert a uniqueConfig instance name(It can be left as default for most cases)
- Check
Integration is enabledand'Not sent status' enabled. - Check
'Get recipients from mailing' is enabledif you want to be able to use the Create Mailing action. - Insert your
Consent source. This needs to be one of the keys from theconsent.sourceoption field, normallynewsletter. - Click
Save - Go to
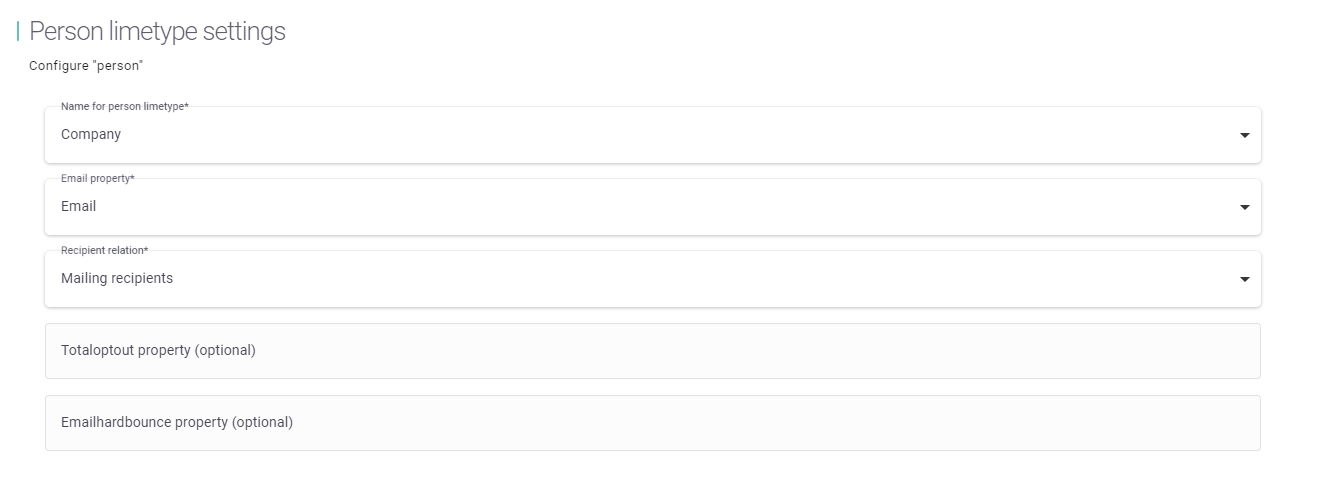
Required limetypesto configure the base limetypes (Participant,Campaign,Person,MailingandRecipient). The add-on will suggest properties for each limetype, change any properties that differ between the customer database and the addon installer.- Participant:
- Set the limetype and properties.
- Set the
importfieldsfor the participant limetype. See infobox below for more information.
- Campaign:
- Set the limetype and properties.
- Set the campaign type and campaign status keys (If you want to filter on which campaigns will be selectable from lime-marketing).
- Related limetype: Set the limetype and properties for related limetype.
- Mailing: Set the limetype and properties.
- Recipient: Set the limetype and properties.
- Participant:
- Set up the
Optional Limetypes(consent,linkclickandemailopening)- Consent: Set the limetype and properties (If the customer will use consents).
- Link click: Set the limetype and properties (If the customer will use link clicks, Remember that
linkclickenabledmust be activated at the top). - Email opening: Set the limetype and properties (If the customer will use email openings, Remember that
emailopeningenabledmust be activated at the top).
- Set up
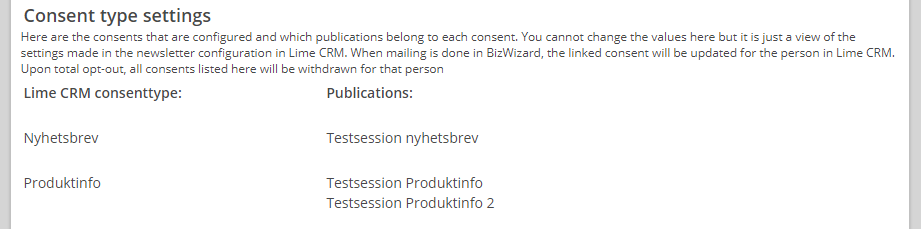
Consenttype mappingby mapping consenttypes to Lime Marketing publication IDs. - Optional: Set up
Object content- this is used to fetch dynamic content for the email templates from limeobjects in Lime CRM. - Optional: Set up
Optin settings- this will create limeobjects when recipients opt in to publications via subscription forms. - Save the config
An example of what a valid config may look like can be found here
importfields
The importfields are the fields that will be imported to Lime Marketing when importing participants from a campaign. Id and email are required for the integration to work but you can add how many fields you want. Remember that the property path starts from the participant object so to add the participant's person's company name you write person.company.name.
Which fields are actually imported depends on the sending method:
- Sending to the participants of a Marketing Activity — all configured importfields are used.
- Sending to limeobjects matching a filter or Using the "Create Mailing" action — the importfields are filtered based on the limetype being used, since recipients are no longer resolved through the participant. Only fields whose path starts with that limetype are imported.
For example, if your importfields are person.name, campaign.name, company.name, and person.company.name, and you are sending to persons via filter or the Create Mailing action, only person.name and person.company.name will be imported.
Before you proceed
- Can you save the config without errors? If not, fix the errors before you proceed with the next steps.
- If you have more than one integration, remember to give it a unique name, the first integration will be named
defaultand the rest need to have a unique name.
If tables and fields don't follow default setup
The following steps are only necessary if the database does not follow the default setup or if you are using another table than person as recipients.
All table names and fields are validated when saving the config so if there are any errors you'll be notified.
Using the company table instead of the person table
These fields need to be changed to company instead of person in the config:
- consent.person
- participant.person
- person.limetype
- recipient.person
2. Set up views in Lime Web client
The webclient views for the limetypes consent, consenttype, linkclick, emailopening, mailing and recipient are installed by the addon installer but you need to configure the views for the related limetype and the campaign.
Manually installing the views for mailing, recipient, consent, consenttype, linkclick and emailopening
If you can't or don't want to use the addon installer you can import the views manually.
Mailing - mailings
Click here to open the example view
Mailing recipient - recipient
Click here to open the example view
Consent type - consenttype
Click here to open the example view
Legal base & consent - consent
Click here to open the example view
Link click - linkclick
Click here to open the example view
Email opening - emailopening
Click here to open the example view
Manual adjustments of views:
-
mailingas a relation on thecampaigncard. -
consenttypeas a field on thecampaigncard and table view. -
total opt-outas a field on thepersoncard and table view. -
emailhardbounceas a field on thepersoncard and table view. -
recipientas a relation on thepersoncard. -
consentas a relation on thepersoncard. -
linkclickas a relation on thepersoncard. Only if they are going to use the link click feature. -
emailopeningas a relation on thepersoncard. Only if they are going to use the email opening feature.
Web component on the mailing card
lime-newsletter contains a webcomponent that can display the email content and statistics view for a mailing on a custom tab. It is automatically added by the addon-installer but it can also be added manually by following these instructions
3. Add a link to Lime Marketing in the user menu
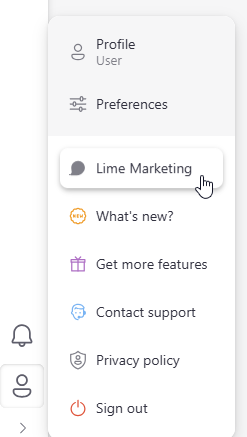
To add a link to the Lime Marketing application in the user menu in the webclient, we need to add an entry in the application config.
Go to the application in cloud admin and add the following entry in the application config, make sure to not break the json structure. The marketing_app_name is the name of the marketing application.
"addons": {
    "lime_marketing": {
        "app_name": "<marketing_app_name_here>"
    }
}
Go to the file application_config.yaml and add the following entry in the config, make sure to not break the yaml structure. Restart the webserver service to fetch the changes. The marketing_app_name is the name of the marketing application.
addons:
    lime_marketing:
        app_name: <marketing_app_name_here>
4. Configure Create Mailing flow (Optional)
To be able to use the Create Mailing flow you need to set up the configuration for that in addition to the steps above. If you don't want to use that feature you can skip this step.
- Make sure that you have set
Get recipients from mailingto enabled in the config instance in Lime Admin in the previous step. - In Lime marketing, go to Administration -> Integrations -> API-key Settings
- Create a new API key, write "Newsletter" as a description and select the newsletteradmin@lime.tech user.

- Copy the API key you got to a secure place, you will need it for the application config in the next step.
- Go to the application in cloud admin and add the following config in the application config, make sure to not break the json structure.
"newsletter": {
    "api_url": "https://app.bwz.se/bedrock/MARKETING_APP_NAME/api",
    "api_user": "newsletteradmin@lime.tech",
}
"newsletter": {
    "api_key": "<api_key_from_previous_step>"
}
- Go to the file
application_config.yamland add the following config in the config, make sure to not break the yaml structure. Restart the webserver service to fetch the changes.
config:
    newsletter:
        api_url: ""
        api_user: ""
secrets:
    newsletter:
        api_key: ""
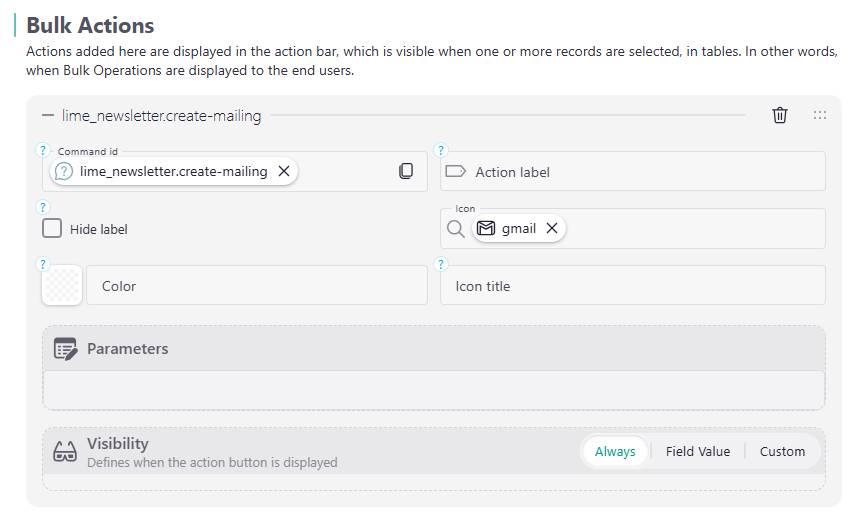
- Add the command lime_newsletter.create-mailing as a Bulk Action to the table view config for the limetype that is being used as recipients, for example Person or Company.
Adding Create mailing flow to existing installation
Skip this if you are setting up a new installation of newsletter, the create mailing flow will be activated when you have a valid configuration and have verified the integration in Lime Marketing.
If you add the create mailing flow to an existing installation, you now need to go to the following:
- Go to newsletter integration page in Lime Marketing and press "Validate settings" to activate the feature.
- Go back to Lime Admin and make sure that Lime Marketing settings in the config instance has been updated with the ID of your Lime CRM integration.
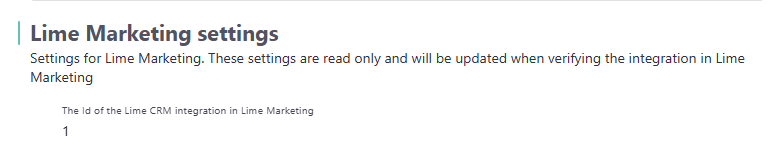
Integration ID is not set?
If the integration ID is not set, you can set it manually in the application config under the newsletter config instance with the key fallback_transactionhandler_id. You can find the ID in the URL for the integration in Lime Marketing, it's the number at the end of the URL when you open the integration.
"newsletter": {
    "api_url": "https://app.bwz.se/bedrock/MARKETING_APP_NAME/api",
    "api_user": "newsletter@lime.tech",
    "fallback_transactionhandler_id": 1
}
5. Add the integration in Lime Marketing
-
First, get the base domain URL for Lime CRM. You can find this in the API documentation in Lime CRM, it's the URL up until /api. It should look something like this:
https://customer.lime-crm.com/customer/
-
Log in to your Lime Marketing site and go to Administration -> Integrations and add a Lime CRM integration from the button in the top left corner. Set a name for the integration and press Create. If you already have a CRM integration you can use that.
-
Go to Newsletter settings in the top bar, enter the base URL for the Lime CRM API and add /newsletter to the end. So if your base URL is
https://customer.lime-crm.com/customer/you should enterhttps://customer.lime-crm.com/customer/newsletterin "URL to newsletter".
-
Enter the API-key for the integration user created by the addon installer in the installation steps.
-
Leave the configuration name empty unless you have changed the config name from
defaultin Lime admin. -
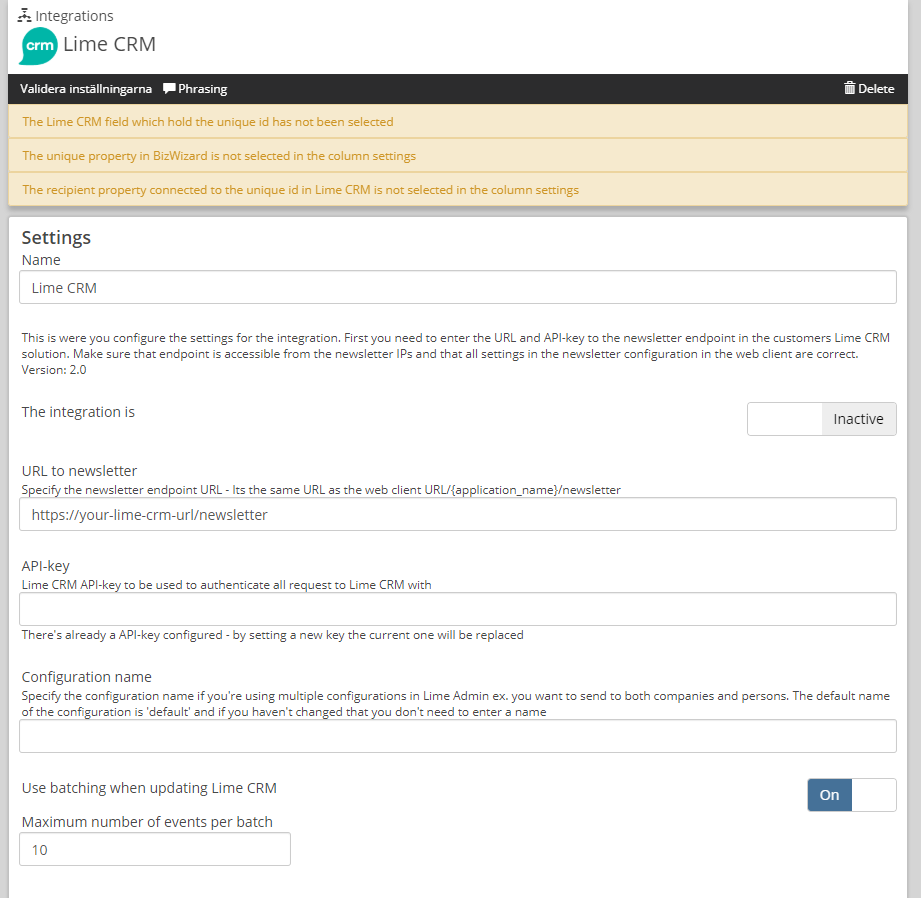
Click "Validate settings" in the top menu.
The Configuration page will look like this with quite a few validation errors and warnings. This is OK, fix the warnings by filling out the required information and click validate at the top left corner. It's really important that you get the URL and API key correct - we won't be able to give you any hints until it's correct.
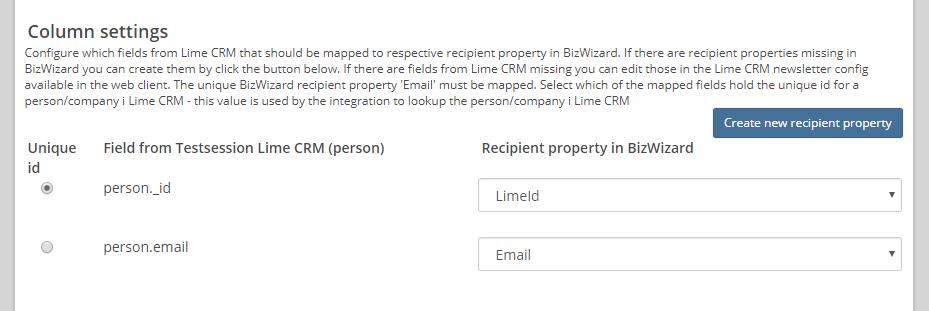
- The column settings are specified in the Lime CRM Admin config under
importfields. Map eachimportfieldto a recipient property. The required ones are email and an id for the person in Lime CRM.
- Lastly you will be able to see your consent mappings from the Lime CRM Admin config listed here, if consents are used in the integration.
6. Verify integration
If everything is validating and no more errors are displayed you are ready to verify.
- Create a test marketing activity in Lime CRM.
- Add yourself as a participant.
- Create a mail message in Lime Marketing.
- Import the participant list from the marketing activity you just made in Lime CRM.
- Send the email.
- Open the email and click on some links.
- Follow up the link clicks and email opening in Lime (if you have that configured)
Next steps
If everything works, you are done with the configuration 🎉. Now it's time to:
- design the customer email template
- edit the publication settings
- configure the sending domain.
Follow the Newsletter Delivery instructions HERE. For Lime employees only.
Special configuration cases
Sending newsletters to multiple Lime Objects
It's possible to have several configurations, for example if you want to do send-outs to companies in addition to the standard persons.
To have more than one configuration simply click Add item under Config instance in the left hand menu and set up the configuration following the steps above for setting up a new integration
Make sure that you set a unique name for the new config instance.
Create a new Lime CRM integration in Lime Marketing and set the Configuration name to the new instance name and add a new recipient property for the id property, for example company id.
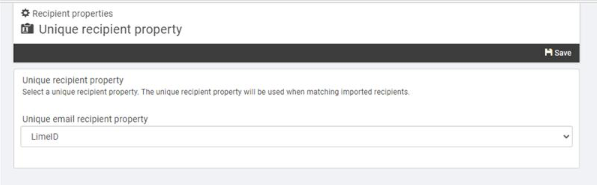
Changing Unique Recipient Property in Lime Marketing
A unique recipient property in Lime Marketing is used to find existing recipients when importing a list. By default, this is the email address, and that will work in 99% of our customer solutions. If the unique recipient property is changed at any point while the customer’s Lime Marketing solution is live, all functionality that is based on the former unique property will be affected. In order to change the unique property for a Lime Marketing application all existing recipients need to have unique values for the property that will become the new unique property.
These features stop working or behave differently when not using email as the unique property.
- Subscription forms (the unique property is mandatory for a recipient)
- Imports - a workaround must be implemented to import to the unique property
- Duplicates - (since email is no longer unique, it's possible to import the same email address multiple times for the same send-out)
Warning
It's in very rare and complex setups that this change is needed. You most likely don't have to change this.
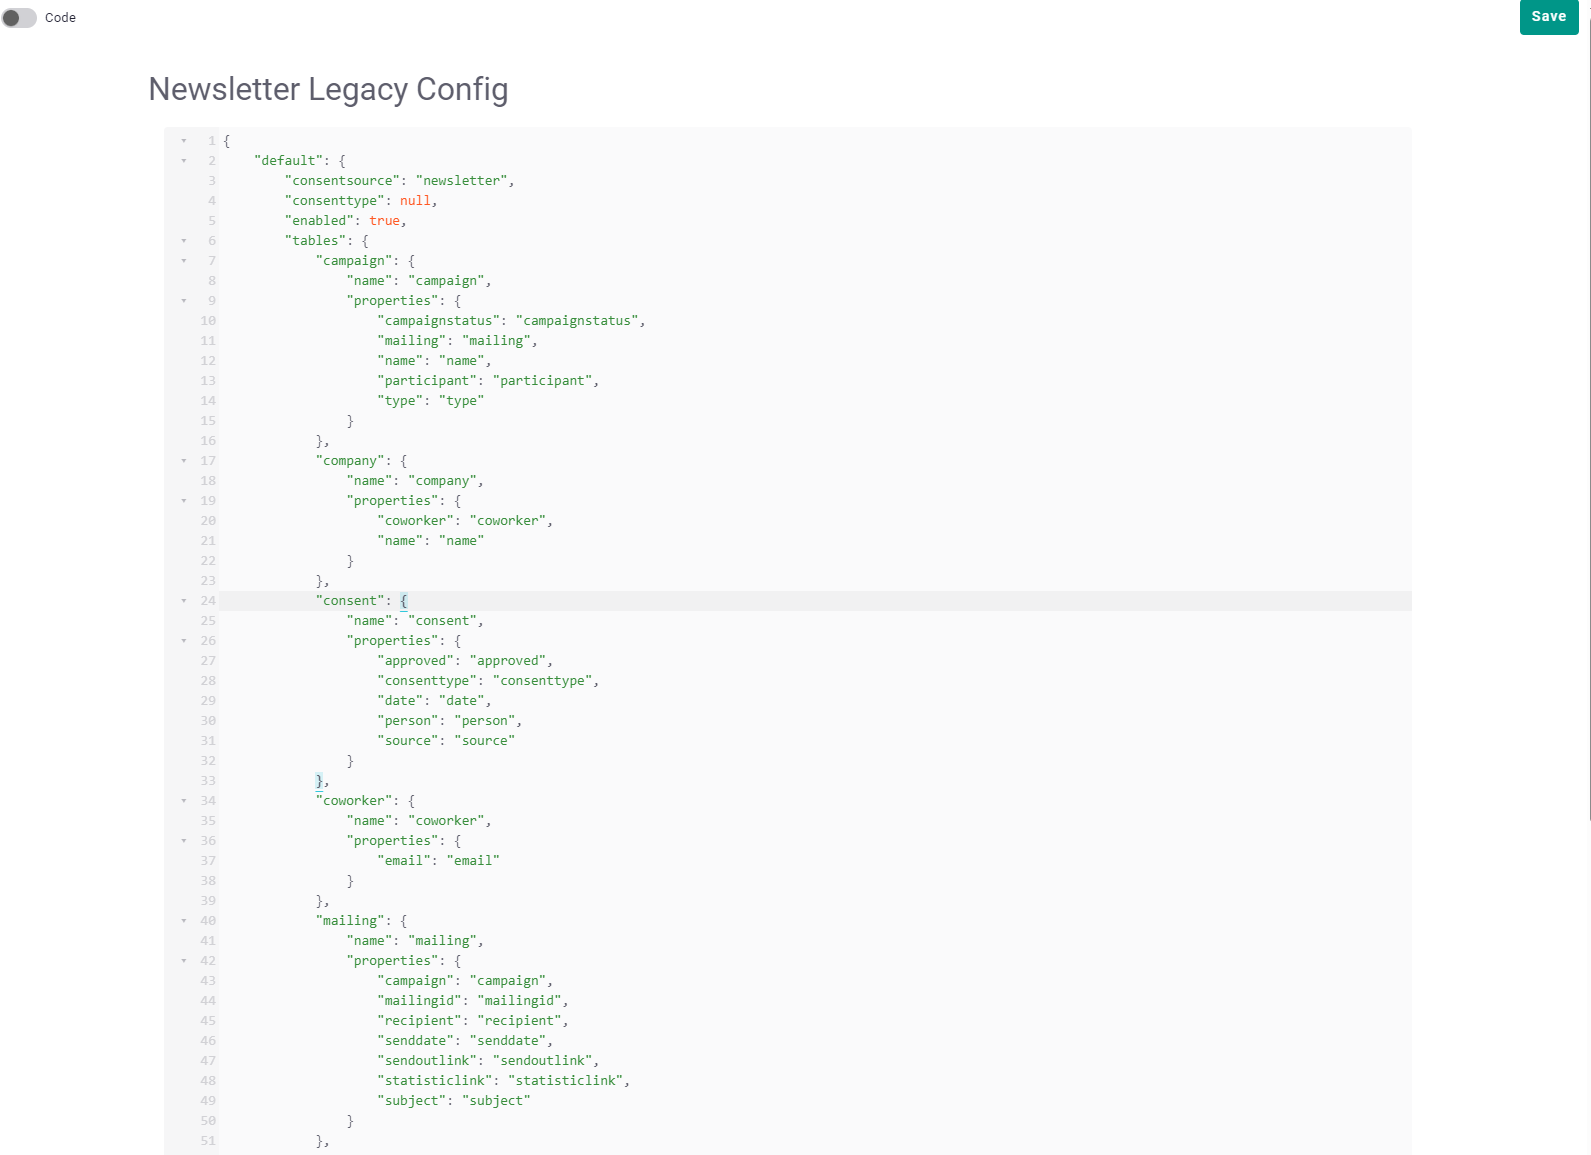
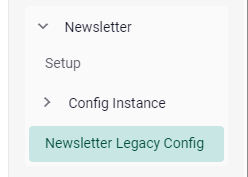
Configuring legacy config in Lime Admin
If you are using the newsletter 1.0 integration you can edit the legacy config from the JSON editor. It will only be visible if you already have an old config in your database.
The legacy config is validated and saved just like the new config and can be used alongside the new config.